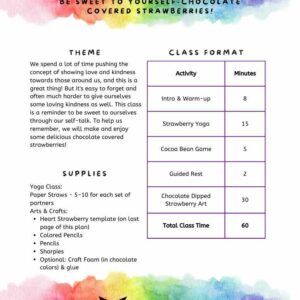
March is the start of spring when we start to see all of the beautiful gardens coming back to life! All month long our classes focus on the theme “bloom where you’re planted” because we can all grow and thrive no matter where we are in the present moment. Typically, I share a preview of a yoga story and steps for a creative project, but I am turning this week’s lesson into a book so we’re just showing a few garden poses here. Our story this week was about a silly squirrel who has dreams to become a clown so he can make the world a happier place. He needs a little help to get the perfect clown look, and as he searches we discover his beautiful garden home hides many dangers. In the end, we learn that by helping others we help ourselves too. Stay tuned and follow along with our upcoming posts as I create this book!
Garden Yoga Poses
Although I’m not sharing our story poses here, I will share a few poses inspired by a growing seed. First we start as a little seed – curl up into a seed pose (child’s pose, with arms down by your sides – maybe try to grab onto your feet)

Next, we start to send out roots to soak up water and nutrients from the soil. We lift up onto our hands and knees and thread one hand under and across our bodies to the other side.

A tiny sprout, reaching for the warm, comforting sun, pokes through the surface of the soil. Stand in our chair poses, fingers pointed toward the sun. Start in a low chair and slowly work your way up to an extended mountain.

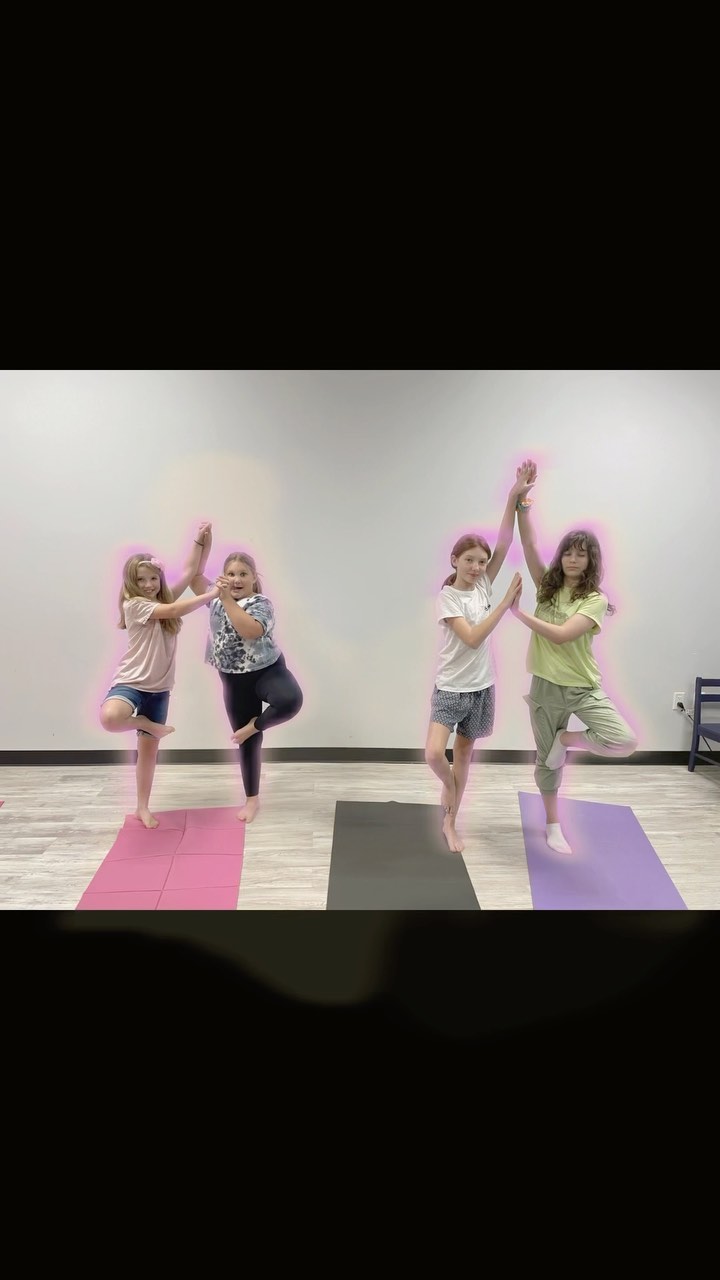
We’ve grown stronger and stronger and now we’re ready to bloom! Get into our tree poses with our hands at heart center. Inhale our hands (still together) up and exhale them down by our sides and then back to heart center. Take a couple more breaths before switching sides and repeating on our other leg. Notice how we feel after taking a few deep breaths.

Blooming Tissue Paper Flower Craft
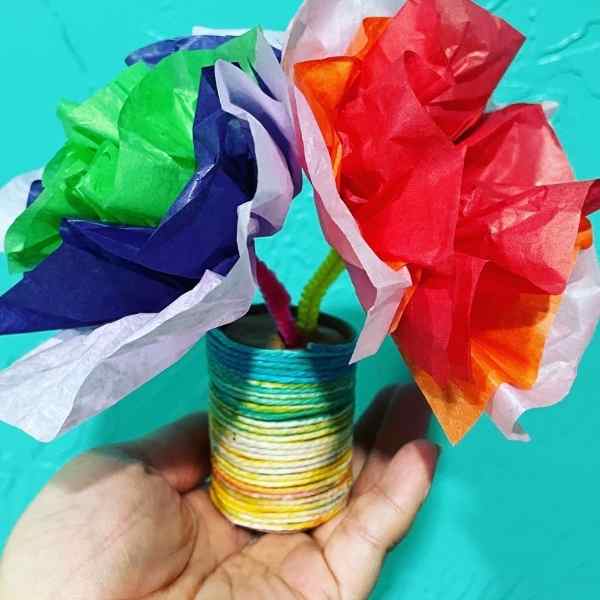
This craft is more about the experience of creating than the end result, but the results are so beautiful! Make sure you have a workspace that can get a little messy as we’re getting our hands into some glue.
Supplies: paper towel roll (cut to about 3 inches tall), tissue paper (cut to 6 inch by 9 inch rectangles), cotton yarn (in several colors or get a variegated yarn), pipe cleaners (6 inch pieces), air dry clay, glue, small paper bowls or plates.
The basic instructions are here, but we’re working on a video tutorial. Check back soon as we’ll post it as soon as it’s ready!
Yarn Wrapped Flower Pot
- Cut yarn into 6 inch pieces. The amount you need depends on the size of your paper towel roll as we’re going to wrap the pieces around the roll until it’s completely covered.
- Pour some glue into your paper plate/bowl
- Take a piece of yarn and soak it in your glue
- Take the glue covered yarn out and hold it at one end with your thumb and pointer finger. With your other hand, place your thumb and pointer finger at the top of the yarn and lightly squeeze as you move them down to the bottom. We’re making sure our entire piece of yarn is soaked while removing the excess glue
- Wrap your glue soaked piece of yarn around the bottom of the tube
- Repeat steps 3-5 until you’ve covered the entire tube
- Set your flower pot to the side to make your flowers.
Tissue Paper Flowers
- Stack up 3 pieces of tissue paper in different colors
- Starting at one end, make a fold about 0.5 to 1 inch in towards the end. Flip your stack over
- Continue folding and flipping (like we’re making a fan or accordion) in 0.5 to 1 inch segments until you get to the other end
- Wrap one end of your pipe cleaner around the middle of the folded tissue paper
- Gently, pull up on the top layer of tissue paper to open up your flower
- Gently, pull up the second layer
- Gently, pull up the bottom layer
- Continue gently working the tissue paper, until you get the look you want.
- Repeat steps 1-8 to make a second flower
Final Assembly
Use your air dry soft clay to make the dirt that will hold your flowers in the pot. First, shape your clay into a long snake. Then, wrap your clay around the stems of your flowers. Make sure to keep the size of your pot in mind as you shape the clay because you’ll need to place it inside. Once you’ve shaped your clay, place it inside your pot and shape it so that it fills the inside.
And your blooming flower pot is complete! Place your work to the side to give it time to dry. The materials used in this craft make it a great sensory piece as we’ll have several different textures from the tissue paper flowers, pipe cleaner stems, and yarn wrapped pot. I hope you enjoy making this craft! Please share your work on social media and tag @yogicubsclub if you decide to make it because we’d love to see how it turns out!